How to Install?
1. Check Your Tap Aerator Type:
Option 1: Hidden aerator – Use the provided Hidden Aerator Key to remove.
Option 2: General aerator – Use the General Aerator Key for removal.
Option 3: Twisting aerator – Use your hand to twist the Aerator for removal
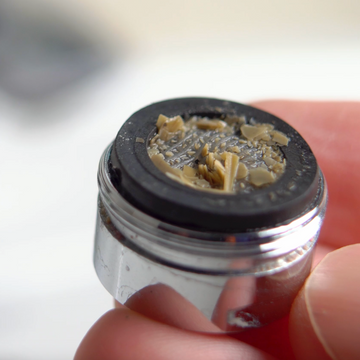
If you're having trouble removing your tap's aerator, it may be due to limescale buildup. To loosen it, simply fill a ziplock bag with vinegar, secure it over the tap so the aerator is fully submerged, and leave it for 10–12 hours before attempting removal again
-
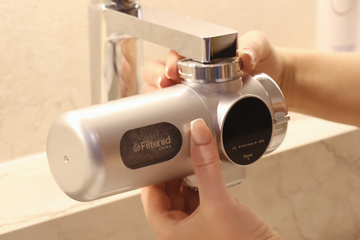
2. Once Removed, unscrew the top of the filter
3. Find a suitable nut from the box to fit your tap
4. Attach a plastic stopper inside of the nut and combine it with the top part of the filter
5. Check rubber mesh piece is placed on the top of the system and Screw on to the tap until tight. Make sure this is level.
6. Remove the filter casing & filtration insert
7. Screw the electronic part of the filter on to the tap- make sure this is tight
8. Remove the plastic from the filtration & attach filtration (Make sure it’s secure)
9.Re attach the window casing of the filtration
10. Make sure the switch on the right hand side is turned to filtered & run the tap for 60 seconds
11. Enjoy clean water daily—Make sure to replace every 3 months for best filtration, even if still functional.
Maintenance & Filter Replacement
- Replace your filter every 3 months even if still functional for maximum filtration benefits.
- Only replace before 3 months if the filter lifespan indicates to change.
- Follow the same installation steps to swap in a new filter.
